Your company information
This is where you add the information about your business. This is used across the app on invoices and quotes and if you use the app to email your invoices, your email and contact information will be used to populate the email with the invoice attached.
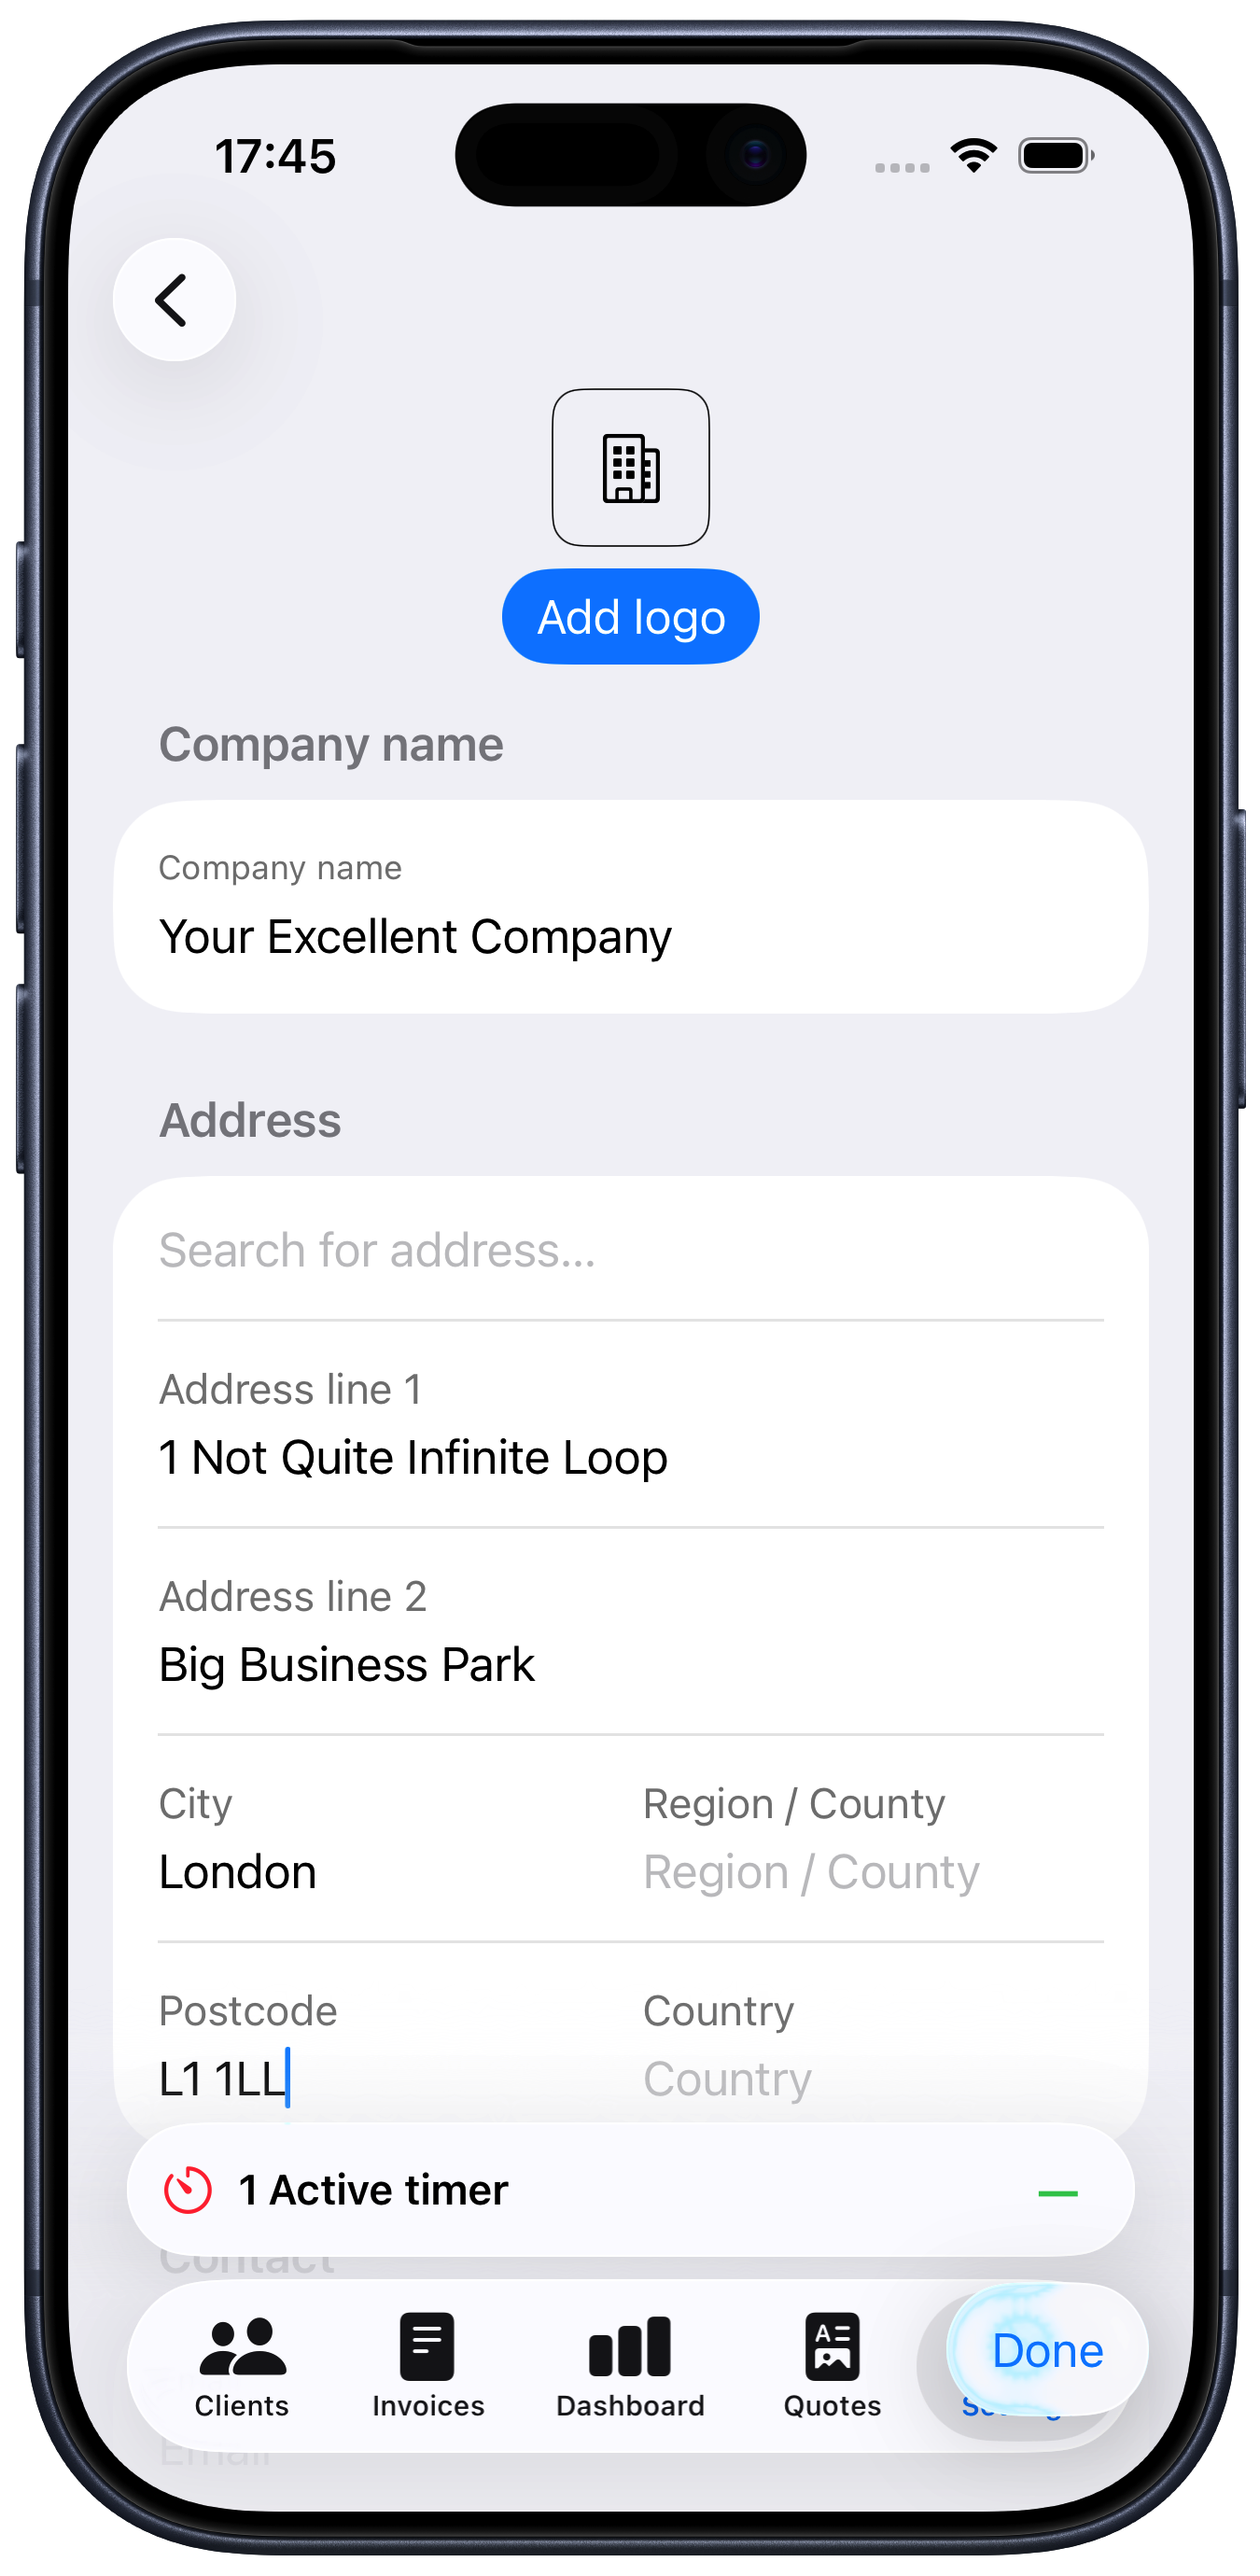
Company logo: You can add your own company logo to invoices and quotes. Just tap on the “Add logo” button then choose the image you want to use.
Company name: Enter the name of your company or business name. This will be used on invoices and quotes.
Address: You can start typing an address in the “Search for address…” field and it will try and find and populate the address for you. Again, this is the address that will be shown on invoices and quotes.
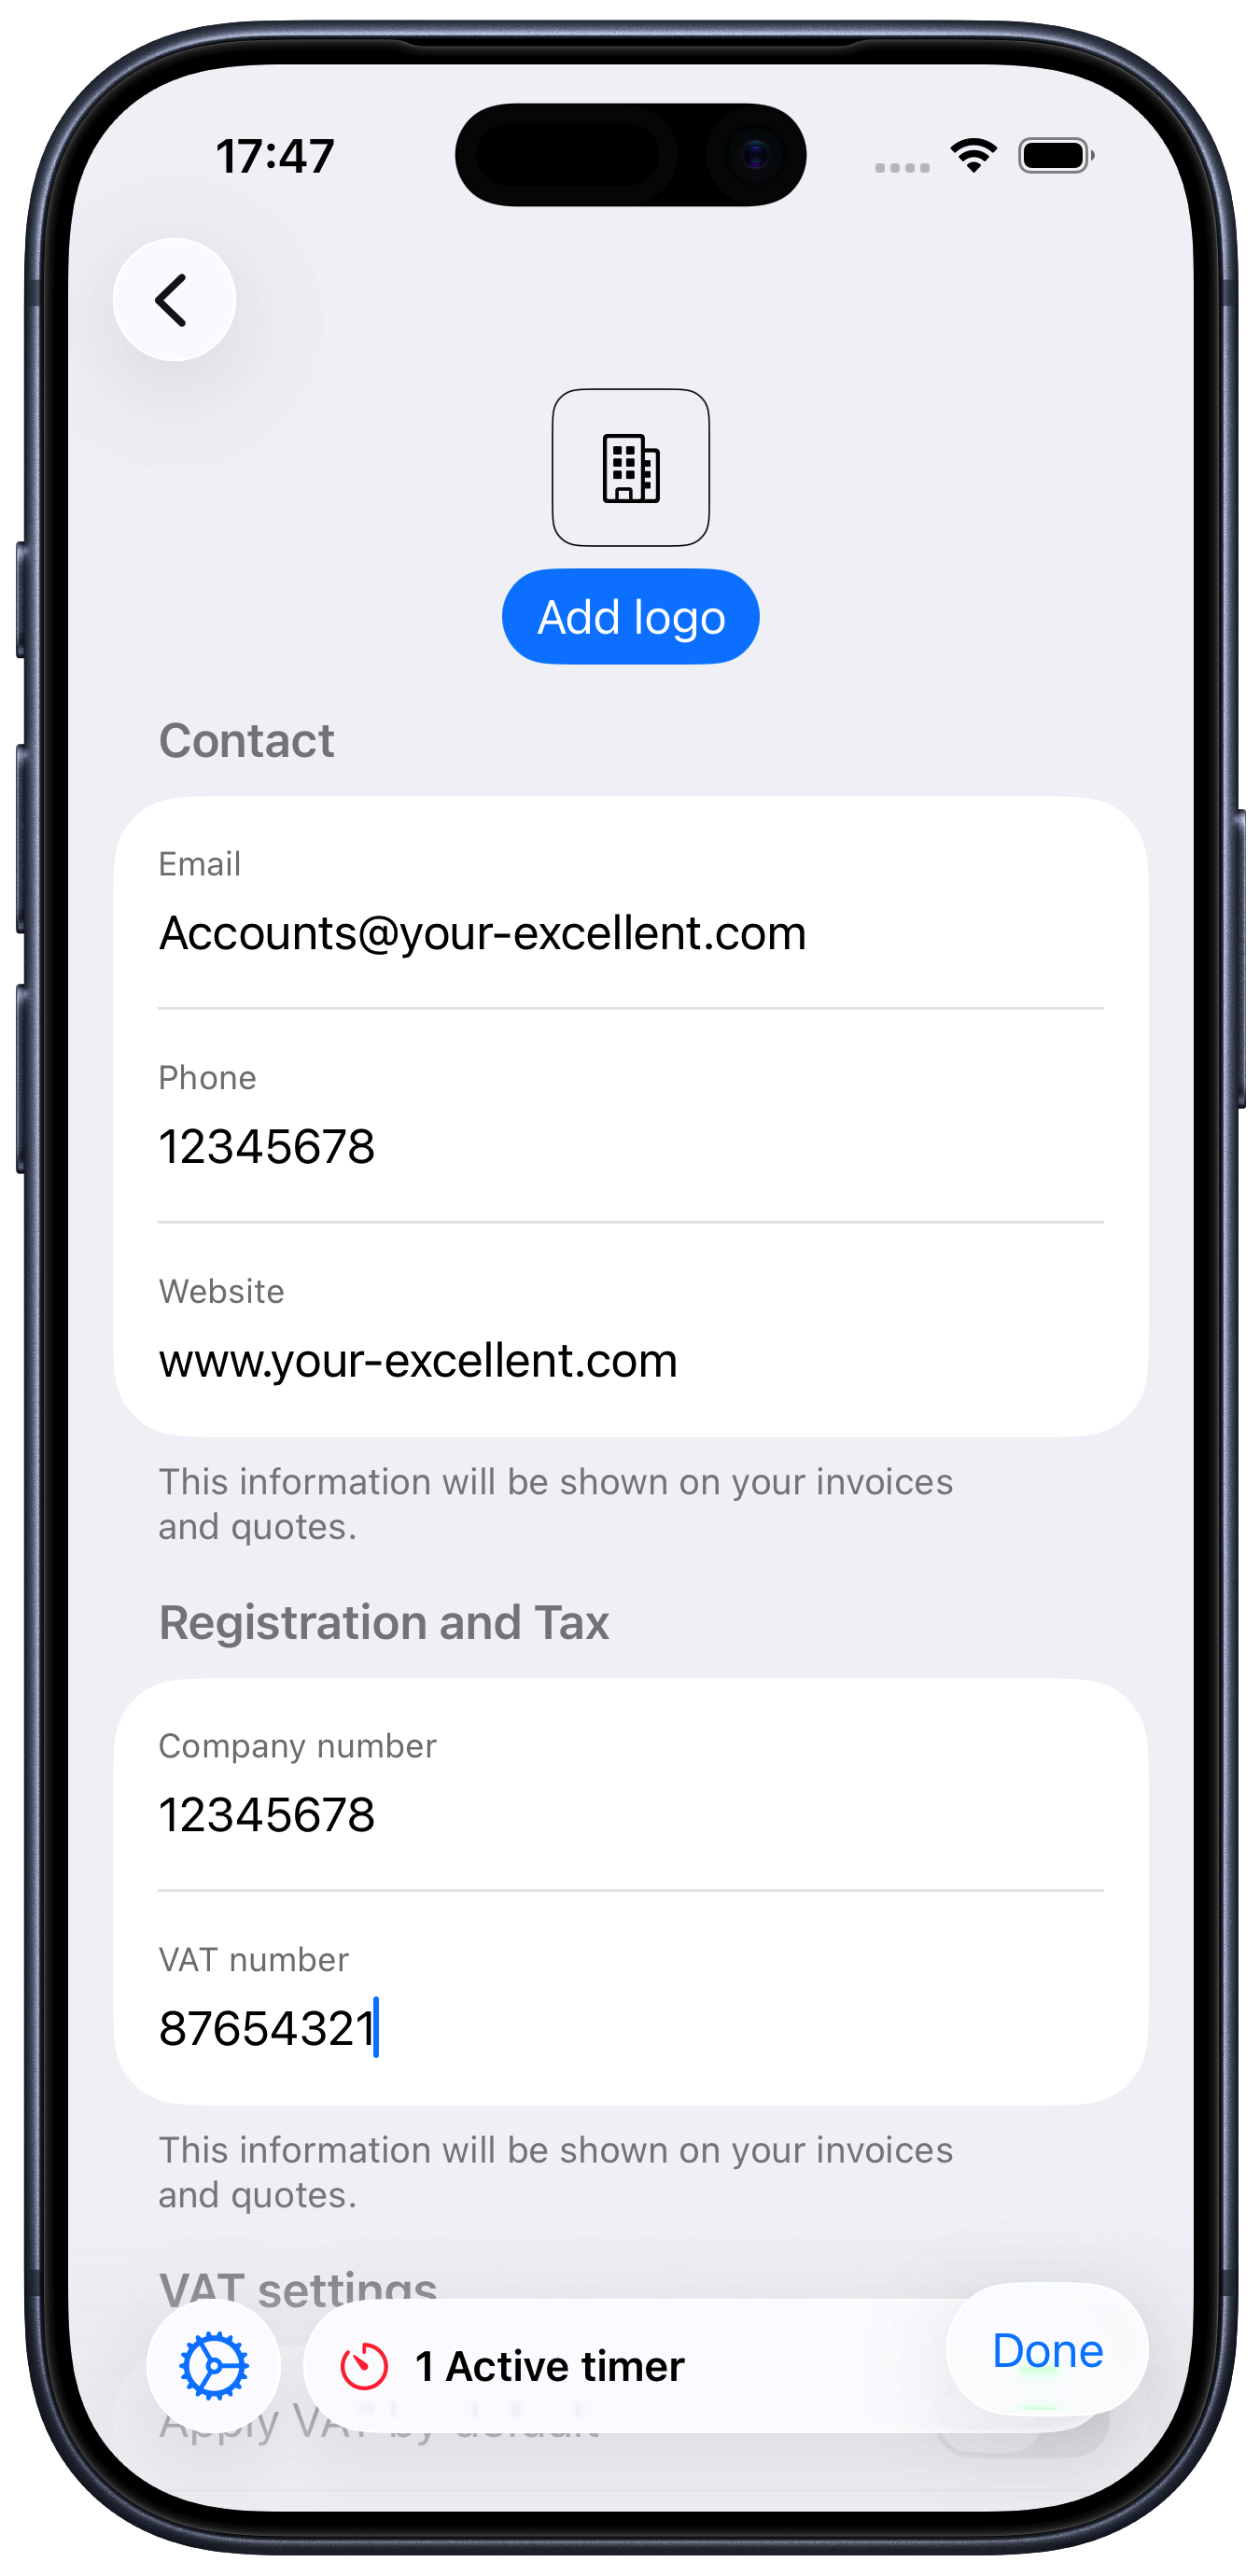
Fill in the contact section with your email, phone and website as required. These will also be shown on the invoice.
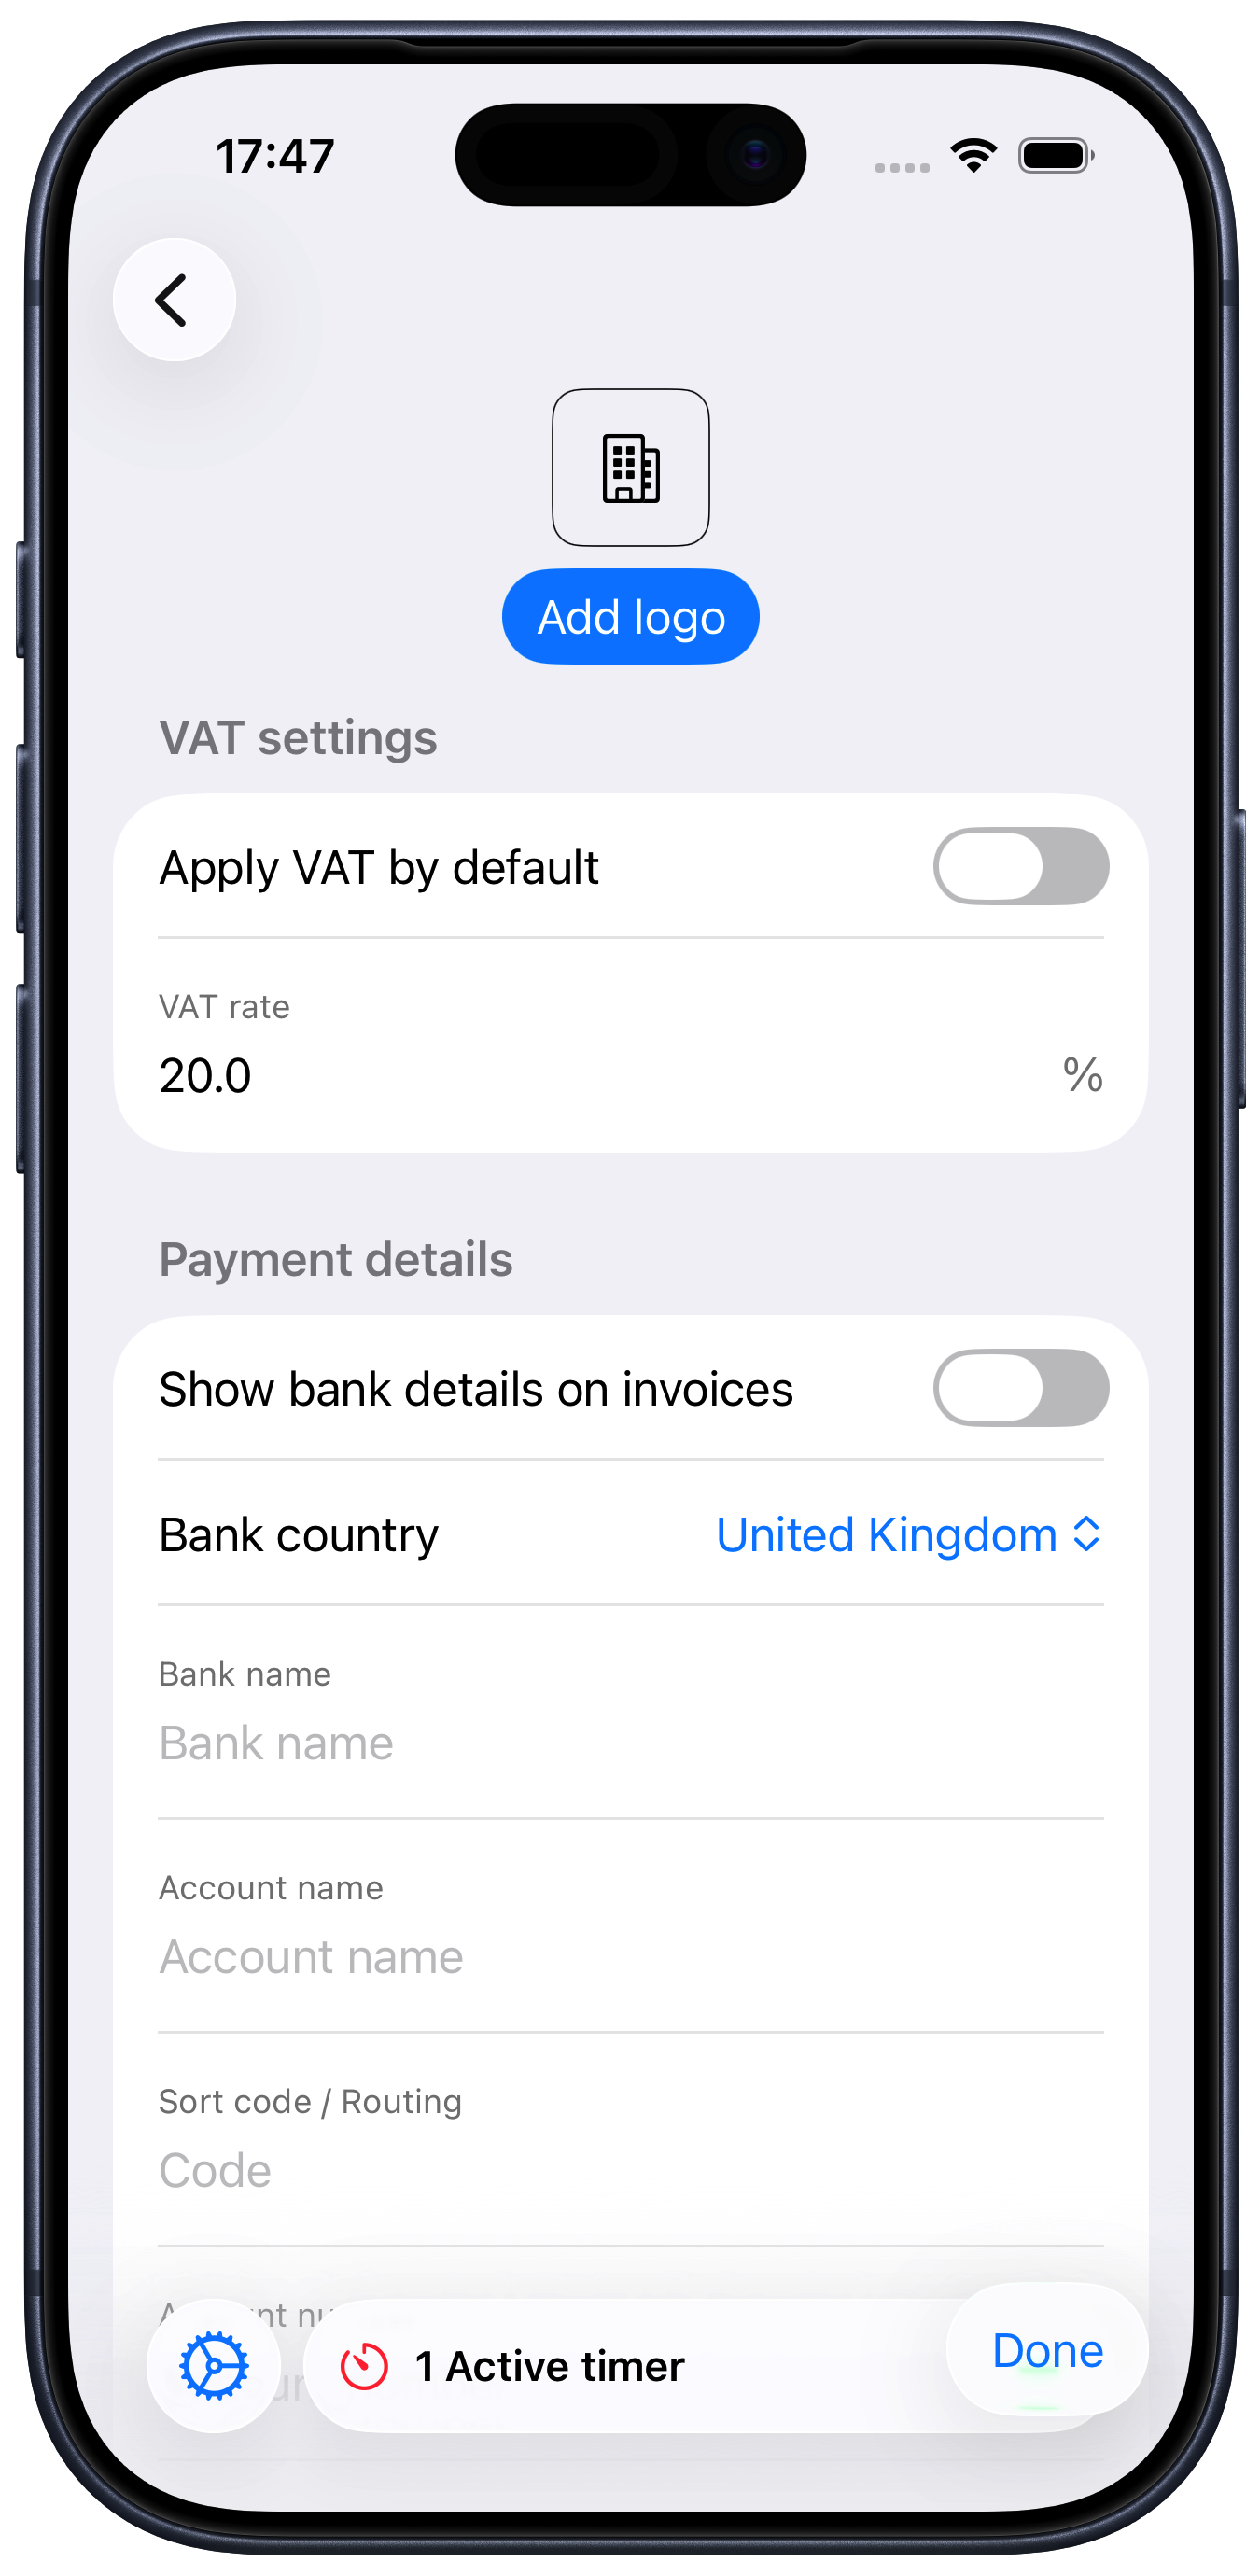
Registration and Tax: Enter your company registration and VAT/Sales Tax number if required. Not if you enter a VAT/Sales Tax number, the toggle “Apply VAT/Sales Tax by default” will be enabled, so you should check the VAT/Sales Tax rate just under that. It defaults to 20% but change this to whatever applies in your country/state.
This information will also be shown on your invoices, and the rate will be used to calculate the invoice amount.
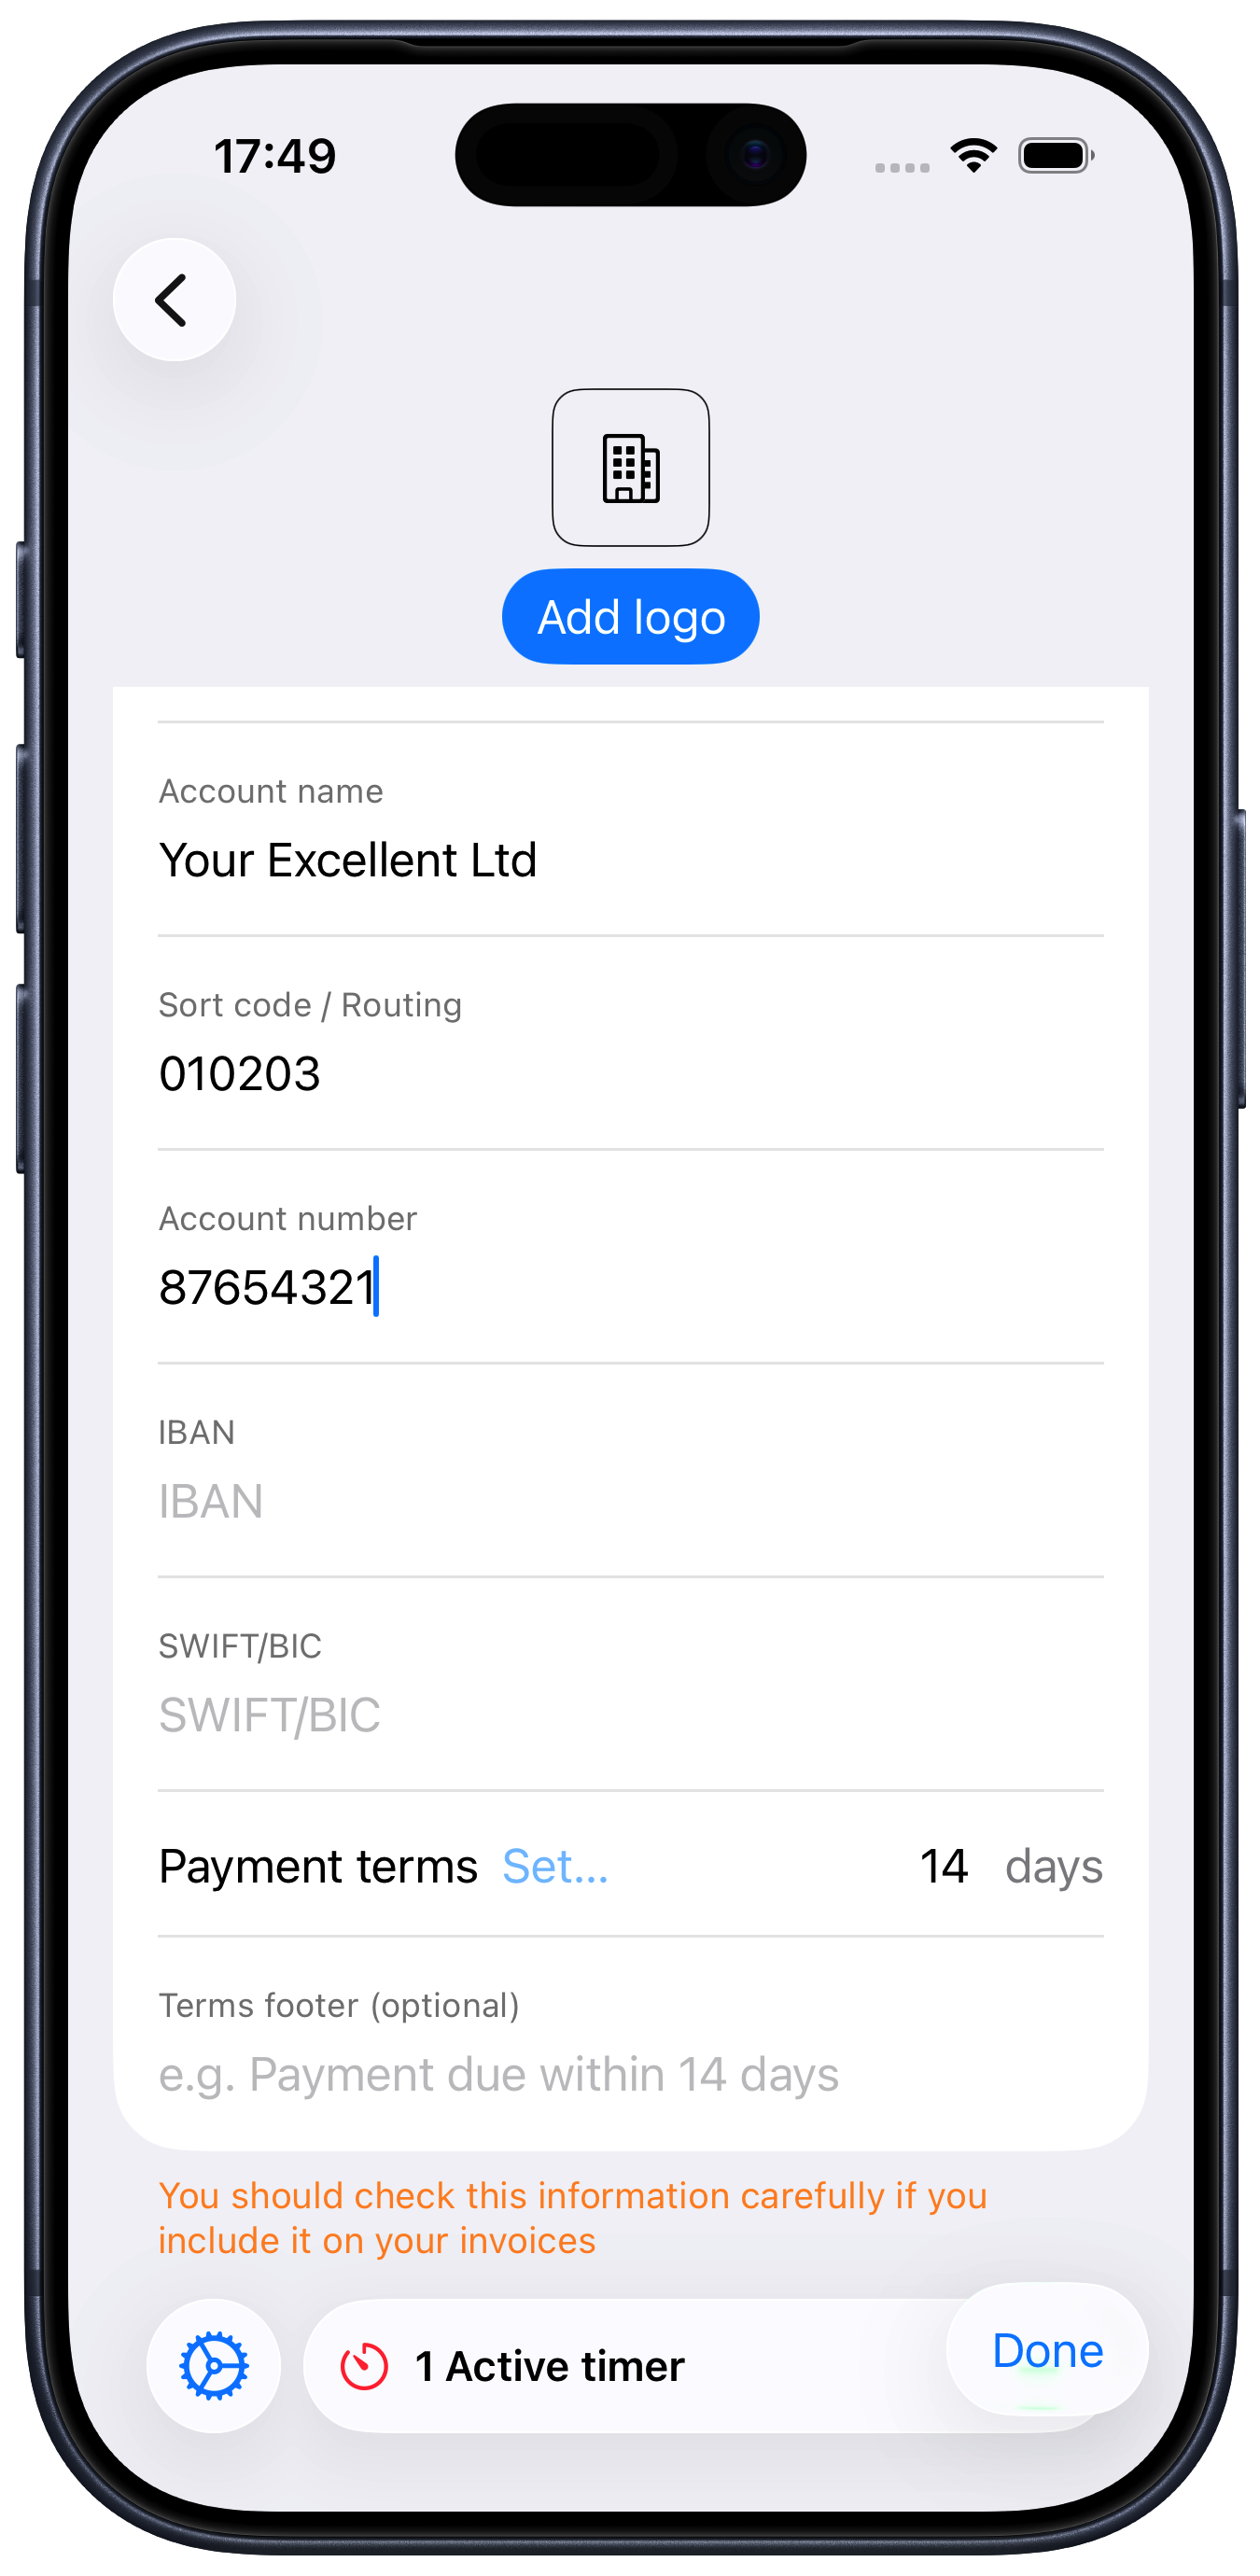
Payment details: If you toggle the “Show bank details on invoices” to on, then any information you fill in in this section will be included on your invoices. The “Bank country” setting is used by the app to try and perform some basic validation on the format of bank account numbers you enter here. You should make sure you put the right information here to prevent payment problems. The information will be shown on your invoices just below the amount due on the invoice.
Payment terms: Choose your standard payment terms from the menu, or if it’s not on there, you can tap on the days and change it to what you want. This will be shown on your invoices and will also be used by the app to show when invoices are overdue etc.